/
Cryptocurrency News Aggregator
Latest cryptocurrency news, market analytics, and forecasts from leading global publications: CoinDesk, Cointelegraph, BeInCrypto, Watcher.Guru, U.Today and others

Ethereum Turns 11 With $148B Stablecoin Base But Cooler Mainnet Fees
Ethereum has turned 11, and the network’s birthday arrives with a very Ethereum-style contradiction: it is still one of the most important settleme...
Jul 31, 2026
4 min read
by NewsBTC

Shiba Inu Team Sets a New Challenge for the SHIB Army: Who Goes First?
The campaign was rolled out just a day before the meme coin project turns six years old.
Jul 31, 2026
< 1 min read
by CryptoPotato

Tether Made $1.5 Billion in Q2 and Its Reserve Cushion Still Halved
In Brief
Tether generated $1.5 billion Q2 operating profit despite heightened crypto and macro market volatility.
USDT reserves exceeded liabiliti...
Jul 31, 2026
3 min read
by BeInCrypto

3 Altcoins That Could Hit New All-Time Highs This Weekend – August 1,2
In Brief
LEO trades 6.5% below its all-time high inside a descending channel.
WBT must reclaim $58 resistance to challenge its $64.43 record.
RAIN...
Jul 31, 2026
3 min read
by BeInCrypto

Roblox Stock Sinks Nearly 14% After-Hours as New Child Safety Measures Weigh on Outlook
In Brief
Roblox shares dropped 14% after hours on mixed second quarter results.
Bookings growth crashed to 8% from 63% just two quarters earlier.
...
Jul 31, 2026
3 min read
by BeInCrypto
Bitcoin Price Tumbles to 2-Week Low as Fed and BoJ Keep Rates Unchanged: Weekly Crypto Recap
The Bank of Japan followed the Federal Reserve's example on Friday.
Jul 31, 2026
< 1 min read
by CryptoPotato

Judge lets FTX recovery trust chase Binance for $1.76 billion over a 2021 share buyback
Counts I–V survived against four Binance entities and Changpeng Zhao, but the trust still must prove and collect.
The post Judge lets FTX recovery ...
Jul 31, 2026
3 min read
by CryptoSlate
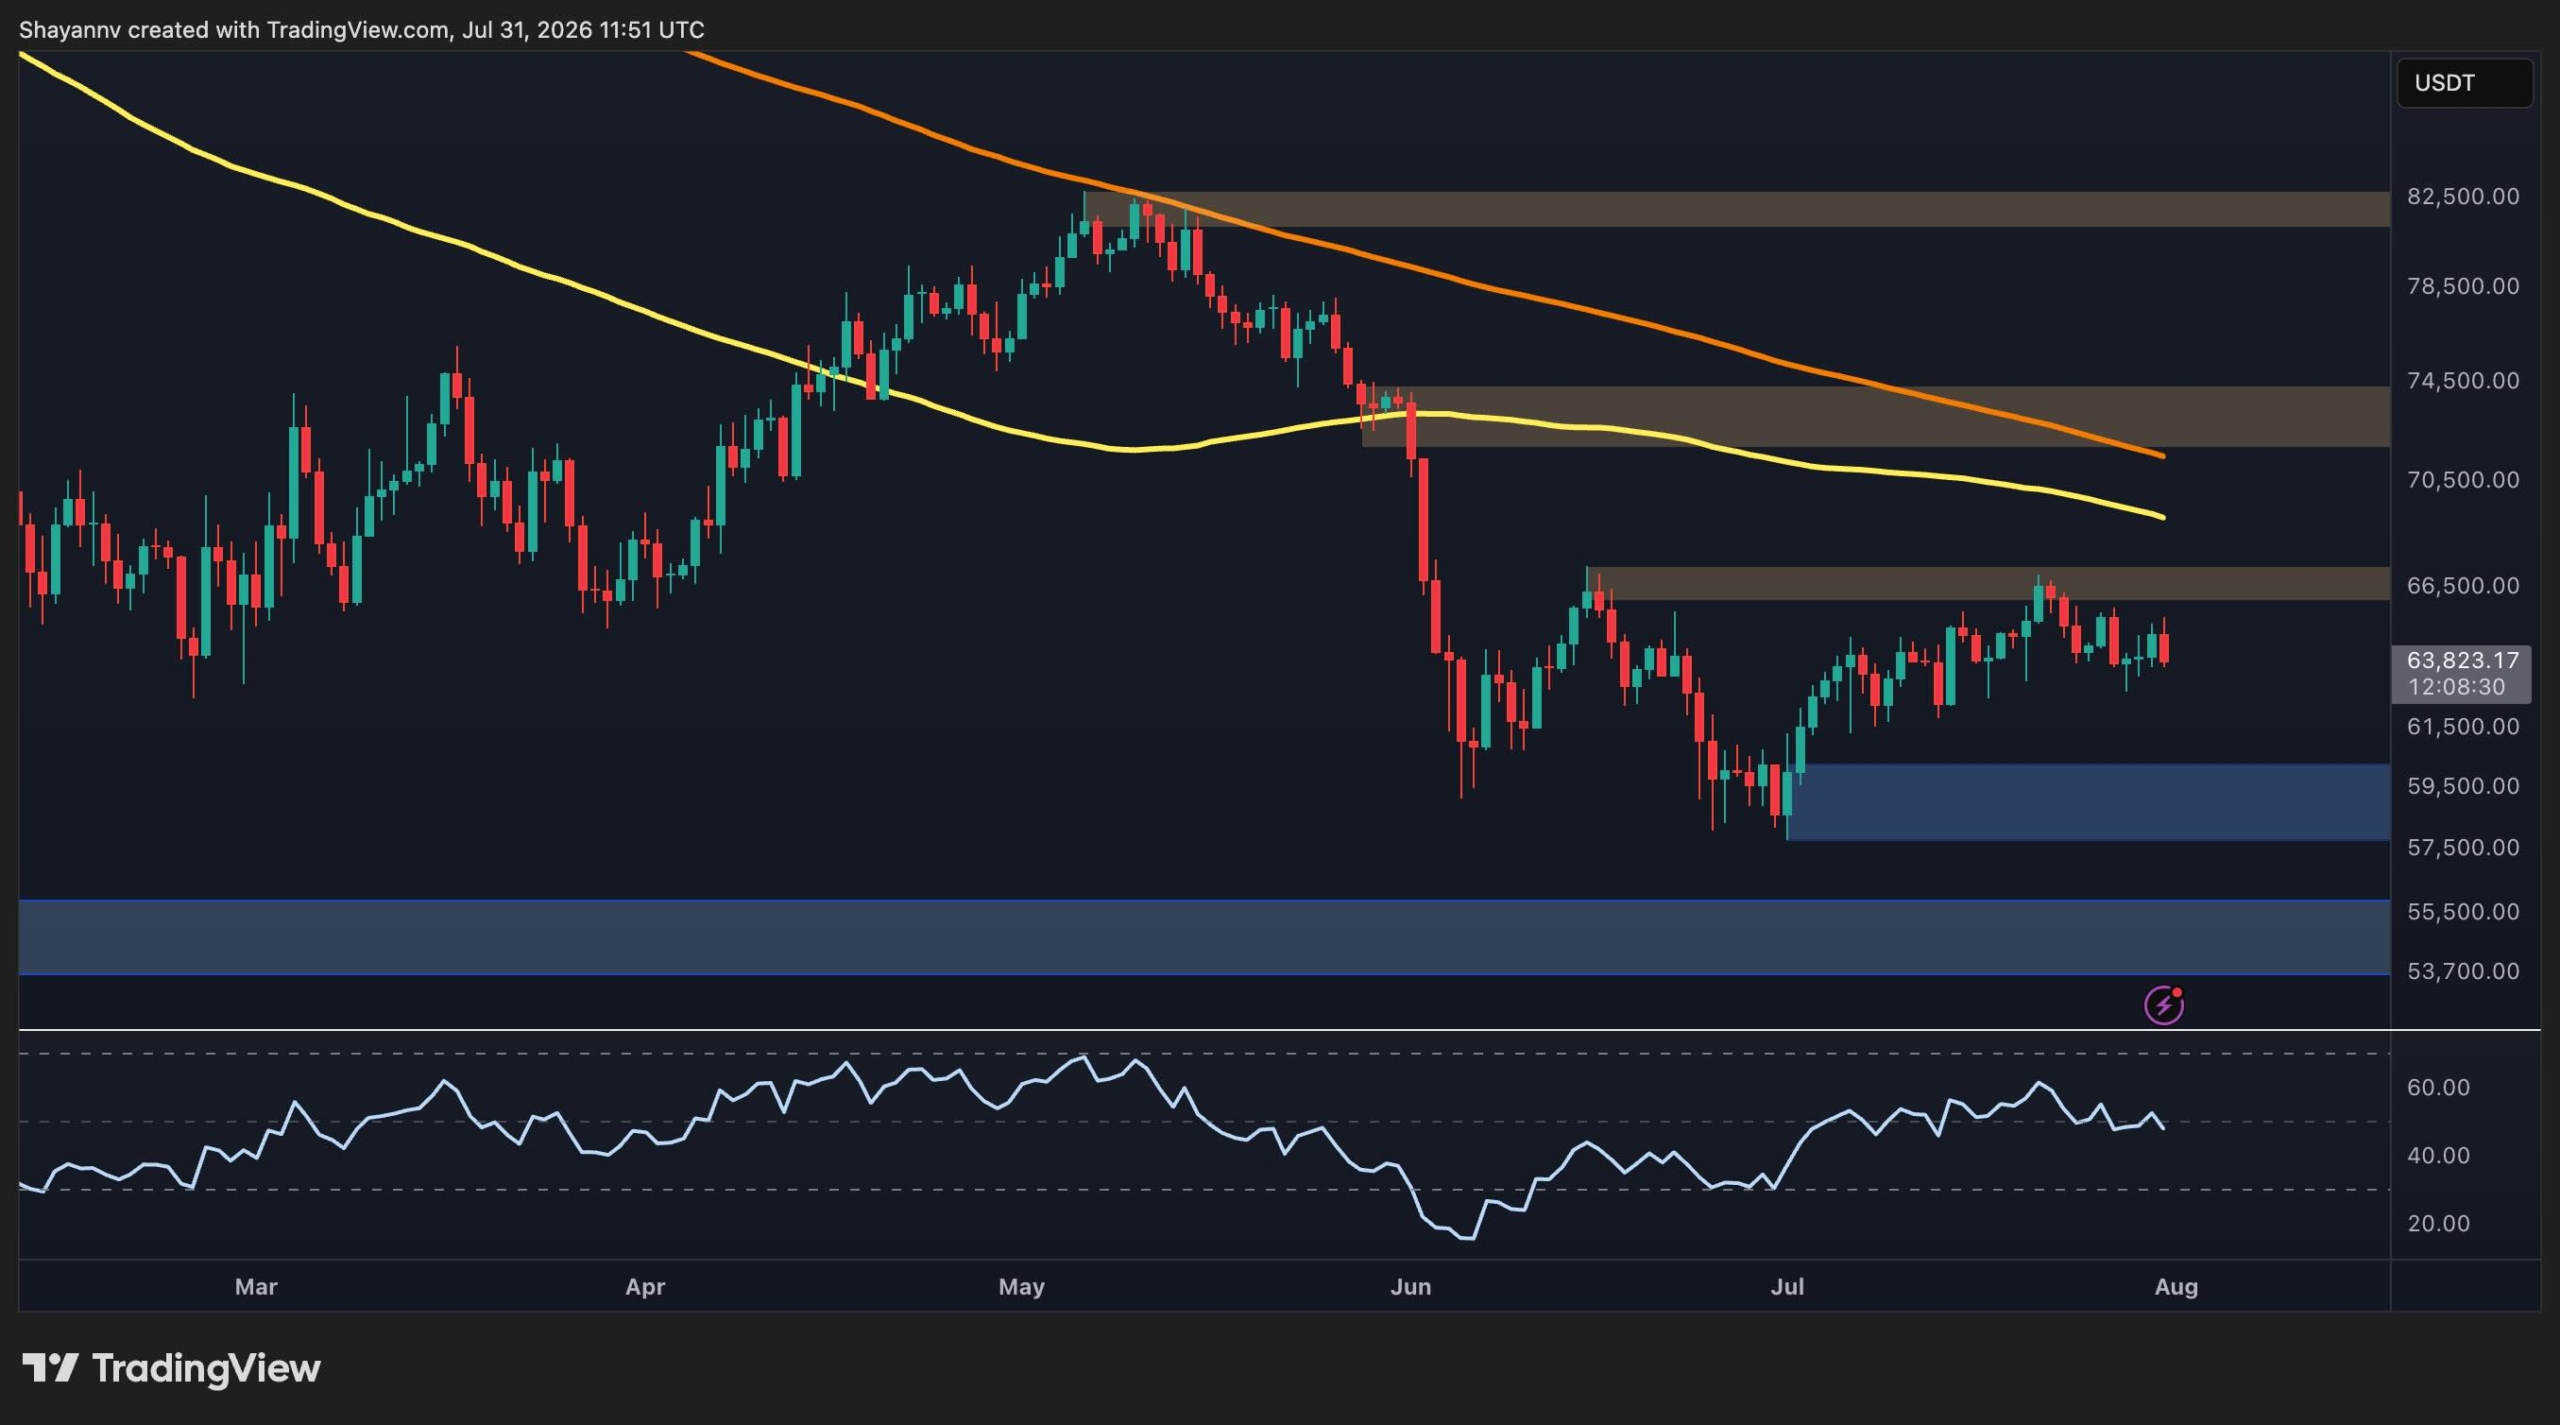
Bitcoin Price Analysis: Is BTC Heading Below $60K After the Latest Rejection?
Bitcoin is still under pressure across the higher time frame despite stabilizing above recent swing lows. While the short-term structure has shifte...
Jul 31, 2026
< 1 min read
by CryptoPotato
Bitcoin Flat Near $64,000 as Kospi Surges 17% — Crypto Decouples from Traditional Markets
Bitcoin near $64,000 ignores a record 17% Kospi surge, revealing a deep market decoupling as crypto struggles with its own liquidity and regulatory...
Jul 31, 2026
3 min read
by BlockchainReporter

Tom Lee vs Jordi Visser on the AI Trade: Both End Up at Ethereum
In Brief
Tom Lee says AI's next leg runs through crypto payment rails, not chips.
Jordi Visser argues the opposite, that AI's easy money is alread...
Jul 31, 2026
3 min read
by BeInCrypto